Hetzner Installimage & Ubuntu
I finally had chance to get a dedicated server at Hetzner for my own projects and use. No client requirements, no deadlines and no specification requirements. Seems like a simple thing but just about every ‘proper’ server I have ever worked on has been for a client or work project. Now that I had access to my own server, it was time to configure it exactly how I wanted.
As usual, I decided to use Ubuntu - I’m familiar with it and I really don’t mind the bloat that could be avoided with the likes of CentOS or Arch. Seeing as the server is only for me, I figured I could do what I wanted.
The first step on any Hetzner bare metal server is to install the OS. To do this I enabled the Installimage function on the server and rebooted. As the server I have has three hard drives (more on this later) I needed to ensure they were configured in the way I wanted. There are three hard drives but two of them are slower/larger. I wanted to make sure I used the smaller, faster SSD as the boot drive. Hetners Installimage system makes this fairly easy - you just edit a text config file.
The example given by Hetzner is the following (this is just the first four lines of a significantly larger config file):
# SSDSC2BB480G4
#DRIVE1 /dev/sda
# SSDSC2BB480G4
DRIVE1 /dev/sdb
In reality, I have another drive and two of them are HDD not SSD. My config looked like this:
# SSDSC2BB480G4
DRIVE1 /dev/sda
# HDDSC220000G4
#DRIVE2 /dev/sdb
# HDDSC220000G4
#DRIVE3 /dev/sdc
The important thing to note is that I have commented out all drives apart from the smaller SSD drive. This way, when Ubuntu is installed, it will only detect one drive and use this as the boot drive. I can then add the other two drives later on.
The final things to change in this configuration file are the SWRAID option and the hostname. The software RAID option needs to be disabled (just comment out the line) and the hostname can be anything you wish.
Then we close the editor (just press F10) and it will start to process the configuration file and check for errors.
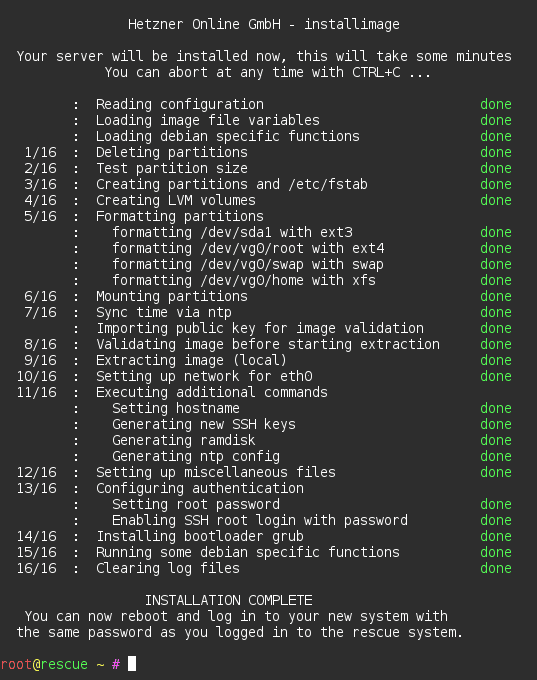
Reboot and the process is complete!
Now, we have Ubuntu installed and the server is up and running with the SSD drive as the boot drive.
The very first thing to do on the new server is to configure the additional hard drives. To do this, we first need to know which device name each drive has.
# ls /dev/sd/*
/dev/sda /dev/sda1 /dev/sda2 /dev/sdb /dev/sdc
We can see from the exerpt above that we have /dev/sda which has two partitions (sda1 and sda2) and we have two additional drives with no partitions (sdb and sdc).
In my server both of these additional drives are the same size and type, so it doesn’t matter to me which one I add first.
The next step, now that we know the device names, is to format the drive(s).
# fdisk /dev/sdb
...
Command (m for help):
We need to confirm there are no existing partitions on the server usually, but I know this is a new drive (new to me at least) and I don’t care if anything on the drive is lost, which it will be!
Command (m for help): p
We see an output of the partition table for this drive, but again, we don’t care. So, onwards to creating the new partition the size of the full disk:
Command (m for help): n
Select (default p): p
Partition number (1-4, default 1): 1
...
You will next be prompted to enter the ‘first sector’ and the ‘last sector’, again, as this is a new drive we can accept the defaults.
Finally, we use the w command to write the changes to the disk. We then repeat the steps on the second drive (`/dev/sdc).
Ok, no we need to create the file system on the newly created partition(s).
xfsprogs is the go-to tool for this for me, it’s so simple it’s practically impossible to mess it up - which is perfect for a personal server I don’t want to spend my spare time fixing.
# mkfs.xfs /dev/sdb1
That’s it - we’ve just created an XFS filesystem on the newly partitioned drive. Repeat the same step for the other drive(s).
So, let’s recap. We’ve installed Ubuntu, we’ve got the SSD drive as the boot partition and now we have two additional drives partitioned and formatted as XFS filesystems. So, next we need to actually mount the additional drives to the OS.
# mkdir /drives
# mkdir /drives/drive1
# mount /dev/sdb1 /drives/drive1
As you can see from above, I mounted my drive(s) to /drives/drive1 and then /drives/drive2 for the other drive. This makes sense for me, you can choose whatever directory you wish for yours.
The drives are mounted, which we can confirm with the mount command mount but this is only for the current session. As soon as the server is rebooted these mounts will drop off. So, we need to make this permenant.
sudo nano /etc/fstab
Then we need to add the following two lines:
/dev/sdb1  /drives/drive1   xfs   defaults  0 0
/dev/sdc1  /drives/drive2   xfs   defaults  0 0
Now the drives will be mounted at boot so they’ll always be available.
Final Note: If you add any more than two additional drives (so the total number of drives exceeds 3) then you will have issues using device names for the mount process. You should use the drive UUID instead. When using the UUID you can be certain that the mounts will always work and the drives won’t get a different mount name each time you boot.